Only thing to do are to properly fix the rear brake cable currently held with cable ties.
29 September 2019
Plycycle Mk2 - Mostly finished.
With shaping done, varnish followed and then as soon as it had cured the final build. The main components are from a donor bike, with alfine 8 speed hub gear, and shimano disc brakes. The forks I had found were quite straight and gave a very twitch ride so we used the forks from the donor bike as they had a good forward reach which mellowed the steering. The twitchy steering was also a result of me making the head tube angle too steep. It was more shallow but I had a brain fart one day and changed it for no good reason, or at least not that I can remember. You live and learn.
Only thing to do are to properly fix the rear brake cable currently held with cable ties.
Only thing to do are to properly fix the rear brake cable currently held with cable ties.
Resurrection
So when I walked away from building this bike in 2016 I had cut two chunks out of the frame where it needed reinforcement but then hung the frame up in my garage and left it there. Cut to 2019and my son Cuan needed a new bike. He asked if we could finish the plycycle Mk2.
The first thing we did was to tidy up the rather bad cuts I had made in the frame and then we set about fitting the new cross ply pieces. The reinforcement plan was simply to resin in fresh plywood at 90 degrees to the existing frame grain. The weakness being that the frame had too much flex and rode like a jelly.
The top tube line could have straight ply plank fitted so we opted Fort Worth pieces of 14mm ply glued straight in with a filament resin. The down tube is curved so we went for three layers of 8mm ply bent and glued with the same resin.
Before we went any further down the build we put all of the components onto the frame to see if it was even worth continuing.
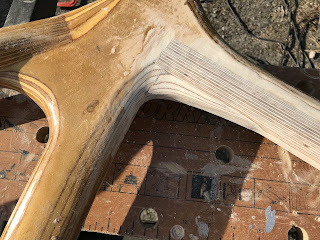
The good news was that our plan had worked. The frame was now stiff and rode properly. We took it all apart again and glued in some wedges to aesthetically improve the joints then set about cutting back the excess material and shaping the frame.
Once all the gluing was finished we shaped the frame using an angle grinder with a sanding disc and then followed that with an electric sander. In all it was an afternoon of shaping and sanding.
Subscribe to:
Posts (Atom)


